At Owlcon this weekend, my game featured some custom Hero Point tokens I'd whipped up. One of my buddies emailed me for directions on making them. I've written about this before in less detail, so it may be old hat to some folks, but I haven't done so for this blog or with this much detail.
Materials Required:
Source Images: The internet is the obvious treasure-trove for this, but I do most of my superhero counters using a program called Heromatic, which was produced by a guy from Brazil some years ago. It's a lot like Hero Machine, but the output is in the style of Bruce Timm's DC Animated Universe artwork. I've got a copy that runs locally, but you can find it, along with two newer versions that do more generic, less copyright-infringing styles here. At one point, the newer versions had an English language option, but I didn't see it when I looked, so be prepared to explore a bit unless you can read Portuguese. I'm so used to the interface in the Animated version that it doesn't bug me, but it did take some getting used to.
Here's an example piece from the Heromatic, the classic Champions villain Firewing:

Of course, I can't use the entire image for a counter, so I then use a screen capture tool to crop out a useful head shot. I use EasyCapture, a freeware utility because it allows me to take a perfectly square image, but you can use the Windows Snipping Tool or any of a number of programs to get what you need.

Repeat until you've got all the images you need. If you're doing a sheet of mooks, you only need one piece of art and you can just reuse it multiple times. I save the images as PNG files, as these seem to handle resizing quite well and they look good online.
The Counter Template: Next up, you'll need a means of laying out the counters. I use PageMaker, but you can set up something in Word or Open Office, or PowerPoint...pretty much any program that will allow you to create a consistent grid and paste/resize artwork over it. My counter template is set up with half inch margins all around with a 1.5" grid. I'll be making 1" counters, so the extra half inch gives me some leeway when I start punching them out.
Here we see the counter template with a Firewing's head and a few other head shots I had sitting on my hard drive:

Printing Stock: Once the counters are laid out, it's time to print them. What I print them on depends on how I'm going to mount them. The portrait counters I usually print out on normal white paper. However, for counters that might be in non-standard sizes or those that I'm going to affix to, say, a poker chip, in the case of the DC logo, I use Avery #8465 Shipping Labels. These are full 8.5" x 11" sheets of label stock that haven't been pre-cut. They're not cheap (about $30 for 100 sheets), but I've yet to go through an entire box.

(Image courtesy of my crappy cellphone camera. You get the idea.)
A 1" Circle Punch: Available at Michael's or Hobby Lobby for about ten bucks. They're in the scrapbooking section. There are a number of models out there. I use this one, because it lets me line things up and see what the final product will look like:

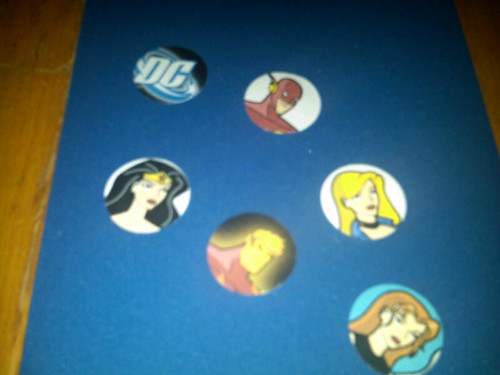
So, once you've got things printed, punch them out. I try to make sure I keep the face/point of focus centered nicely. Here's the punched out counters, again courtesy of the crappy-cam.
Mounting: The final step. As I mentioned before, I either print these out on normal paper or on label stock depending on how I mount them. For the 1" circular counters, I typically use these:

These are 1" wooden disks, with letters of the alphabet on one side, and a pre-applied sticker backing on the other. They are PERFECT for these counters. Just peel off the back and stick the punched paper on them. And they only cost about two bucks for 52 disks.
When I first began doing this, I used blank disks and actually decoupaged the punched counters to them. However, this was sticky, time-consuming, and the decoupage medium often made the ink run. The ones that turned out WERE durable, though. Also, for reasons I can't begin to comprehend, the blank disks are a lot more expensive than the alphabet/adhesive ones.
For my custom Hero Point tokens (the DC logo), I used my label stock and affixed the output to poker chips.
For larger or non-standard counters, I print them on label stock and mount them on lightweight craft foam (I'm using a few sheets as a backdrop for my photos of this project). It's cheap (I think I got 200 sheets for a dollar the last time I bought some), and can be cut with scissors. So I just mount the counters and cut them out. I've also used this technique for home-made dungeon tiles, since the craft foam resists sliding around on the tabletop.
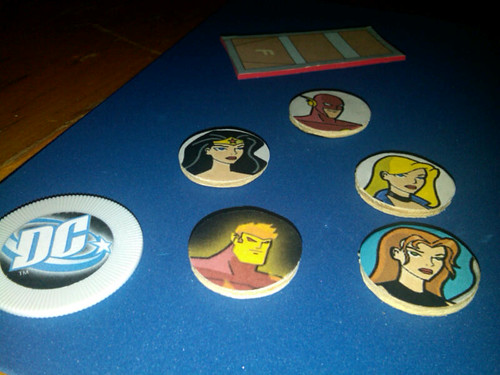
Here's the finished products, along with one of the Hero Point tokens I made for last weekend and a non-standard counter from my old Champions game (the Foxbatmobile):
And that's all there is to it. Any questions?
Nicely done! I love the DIY counters. I have no skills with the compy (other than writing barely coherent blog posts) and have to rely on WotCs lumpy plastic figs. ;)
ReplyDeleteHave a good night and enjoy your time off!
If you can make "Faces in the Crowd," you can make counters like these. But the lumpy figs certainly have their attractions.
ReplyDelete